If there is one project I recommend to almost every woman I work with, it's this one. A feature wall — also called an accent wall — is single-wall painting that creates a focal point in a room. It's bold, it's intentional, and it transforms the way a space feels from the moment you walk in.
It's also, I want to be clear, one of the most beginner-friendly painting projects you can do. You're painting one wall. You're not matching the rest of the room, you're not worrying about a second coat on every surface, and the impact-to-effort ratio is genuinely one of the best in home improvement.
Here's how I walk clients through it — from choosing the wall to the final reveal.
Step 1: Choose the right wall
Not every wall works equally well as a feature wall. The best candidates are:
- The wall you see when you walk into the room — this is the natural focal point and draws the eye immediately
- The wall behind your sofa or main seating — it frames the whole living area and anchors the furniture
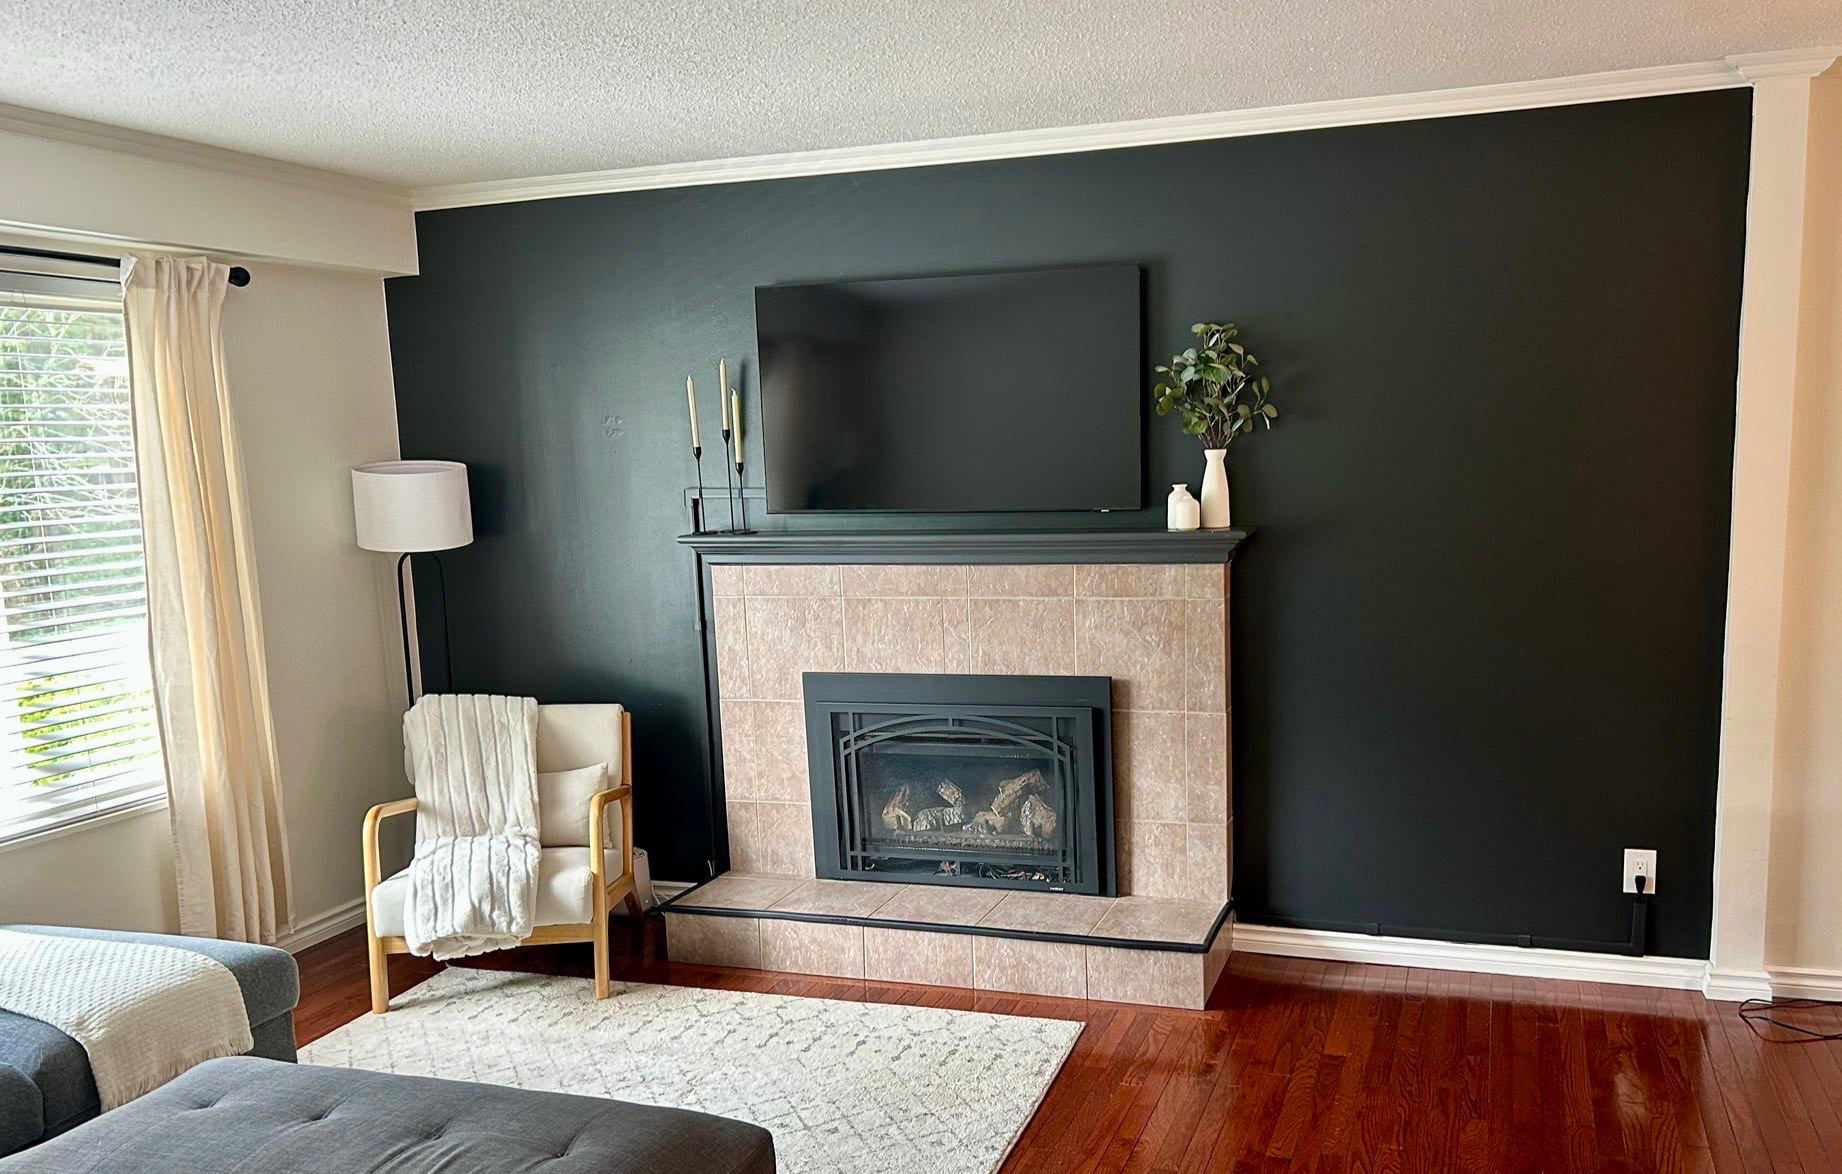
- A wall with architectural interest — one with a fireplace, a nook, or built-in shelving
Avoid the TV wall if possible — it tends to compete with the screen and fragments the room's visual focus. And avoid walls broken up by lots of small windows or doors; you want a clean canvas.
Step 2: Pick a colour with confidence
This is where most people freeze, and I completely understand why. The colour you choose needs to work with your existing furniture, flooring, and the light in the room — and paint looks dramatically different on a wall than it does on a tiny chip at the store.
"Go bolder than you think. The number one thing I hear after a feature wall is done is: 'I wish I'd gone darker.' You can always go lighter next time."
A few practical tips:
- Get samples — buy 2–3 small pots and paint large swatches (at least 12x12 inches) directly on the wall. Live with them for 24 hours before deciding.
- Test in both natural and artificial light — paint looks completely different at 10am versus 8pm. A warm grey can look purple at night; a cool blue can look almost white in bright sun.
- Look at what's already in the room — the undertones in your sofa, rug, or flooring will either harmonize with or fight your wall colour. Pull from those.
- Deep colours often work better than you expect — navy, forest green, charcoal, deep terracotta — these add warmth and drama without making a room feel small, especially if you have good lighting.
Step 3: Prep the wall properly
Prep is the step most beginners skip — and it's the most important one. A feature wall in a fresh colour shows every imperfection, so the time you spend here pays off ten-fold when the colour goes on.
- Fill any holes or dents with lightweight spackle. Let it dry completely, then sand smooth.
- Wipe down the wall with a damp cloth to remove dust and grease (especially near light switches).
- Tape the edges — use FrogTape or good-quality painter's tape along the trim, ceiling, and where the wall meets adjacent walls. Press it down firmly.
- Prime if needed — if you're going from a light to a very dark colour, or painting over a bold existing colour, one coat of tinted primer will cut down how many coats of the final colour you need.
Step 4: Paint it
The actual painting is the most satisfying part — and also the most forgiving. Here's the order I always do it in:
- Cut in first — use your 2-inch angled brush to paint a 2-3 inch band around all edges (corners, ceiling, trim). Take your time here. The crisper this is, the more professional the whole wall looks.
- Roll the field — use a 9-inch roller in a "W" or "M" pattern to avoid roller marks and ensure even coverage. Work in sections from top to bottom.
- First coat — don't stress if it looks patchy. It almost always does on the first coat. Let it dry fully (usually 2 hours).
- Second coat — this is where the colour blooms and the finish becomes what you imagined. Two coats is almost always enough, even for deep colours with a good quality paint.
Remove the painter's tape while the paint is still slightly damp — not fully dry. Pulling it off wet gives you a much cleaner edge.
Want to take it further?
A solid colour feature wall is beautiful on its own — but if you want to add more texture or dimension, here are some ideas I've worked on with clients:
- Limewash paint — creates a soft, layered, slightly aged look. Works beautifully in living rooms and bedrooms. Venetian plaster and limewash techniques are trending right now and easier to DIY than most people think.
- Geometric tape pattern — use painter's tape to create a geometric design (herringbone, chevron, or simple rectangles), paint the field, remove the tape to reveal clean lines. No artistic skill required — just precise taping.
- DIY board and batten effect — install simple MDF strips in a grid pattern (or just vertically), paint the whole wall the same colour, and you get a classic wainscoting look for a fraction of the cost.
- Wallpaper on a single wall — if paint isn't calling to you, peel-and-stick wallpaper has come a long way. It's renter-friendly, achievable in an afternoon, and completely removable.
The whole point
A feature wall is one of the fastest ways to make your home feel curated, intentional, and completely yours — without a renovation budget and without needing any experience. It's also a project you can do on a Saturday afternoon. The materials cost less than most candles at Restoration Hardware, and the result lasts years.
If you've been thinking about an accent wall and you're not sure where to start, I run a 60-minute virtual workshop — Accent Wall Made Easy — that walks you through my exact four-step process, including how to choose your colour, how to prep, and how to paint like you've done it before.
You'll walk away from that workshop ready to do it yourself, that weekend. Come join us — it's one of the most practical hours you'll spend on your home.
— Sheri Walker · South Surrey, BC